
Introduction
Have you ever wondered how to make eye-catching DIY ghost decorations that will impress your neighbors and make your Halloween unforgettable?
You’re not alone—every October, thousands of people search for creative ways to craft homemade ghost decorations, easy DIY ghosts for their yard, and even glowing outdoor ghost decorations that stand out at night.
The good news? Creating your spooky ghosts is easier and more fun than you might think.
In this ultimate guide, you’ll discover step-by-step instructions for DIY ghost decorations, including tips for making homemade ghost decorations, DIY lawn ghosts, and light-up Halloween ghost crafts.
Whether you’re a beginner or a seasoned DIY enthusiast, we’ll help you transform simple materials into hauntingly beautiful ghosts that’re perfect for any home or yard.
Table of Contents
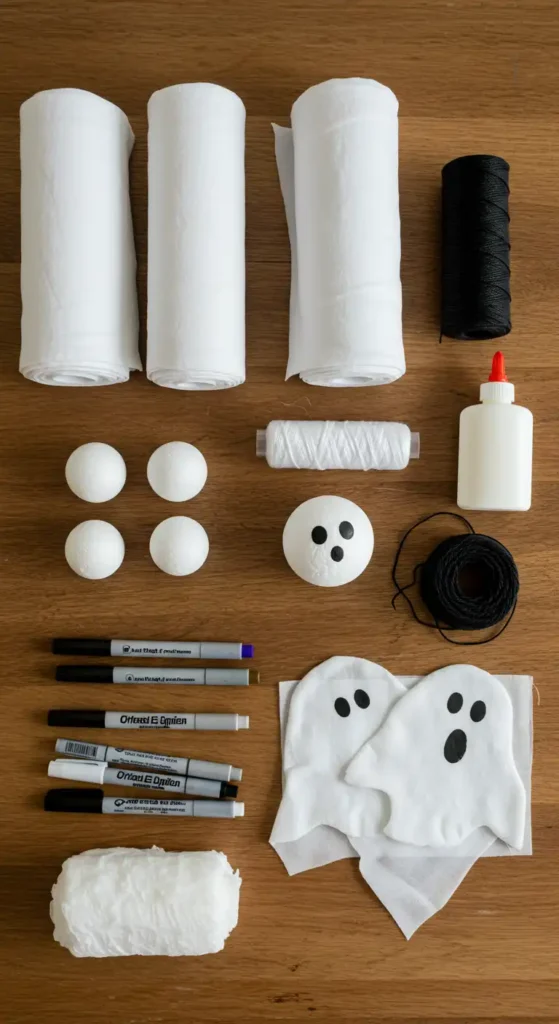
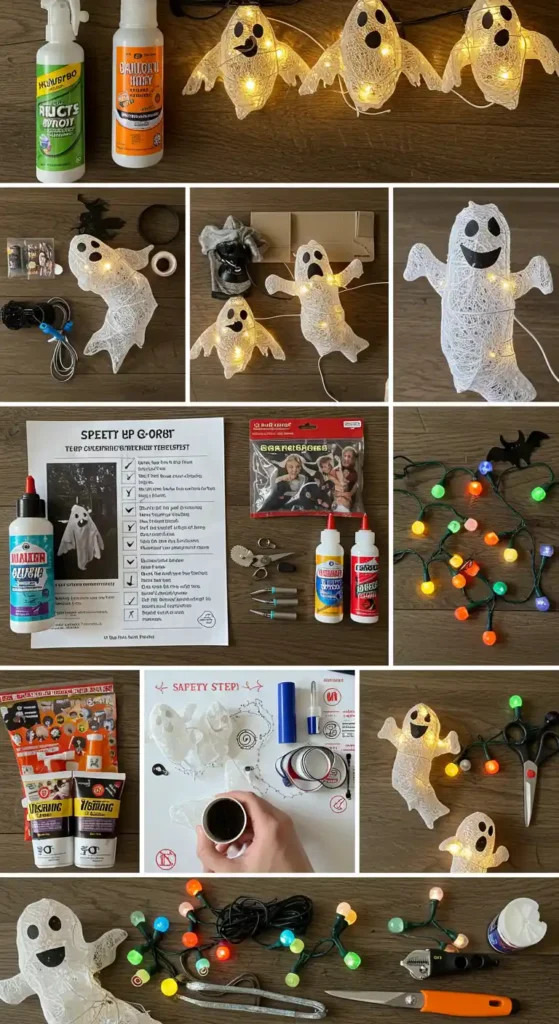
Essential Materials for Ghost Decorations
Before you start crafting, gather your supplies. The best part about homemade ghost decorations is that they’re budget-friendly and can often be made with things you already have at home.
Basic Materials:
- White fabric (old sheets, cheesecloth, gauze, or T-shirts) for your DIY sheet ghost decoration
- Balloons, foam balls, or plastic bottles (for the ghost head)
- String, fishing line, or wire (for hanging/floating effects)
- Markers or black felt (for the face)
- Scissors and tape/glue
Eco-Friendly & Upcycled Options:
- Use old pillowcases or fabric scraps for your homemade ghost
- Newspaper or cardboard for stuffing or a head shape
- Natural twine for hanging
Kid-Safe and Budget Tips:
- Avoid small parts for young kids when making easy Halloween ghost crafts
- Use non-toxic markers/paint
- Dollar store finds work great for basic supplies
Pro Tip:
If you’re making DIY outdoor Halloween ghosts, grab a can of clear waterproof spray to help your creations withstand wind and rain.
Step-by-Step: Classic DIY Ghosts for Indoors & Outdoors
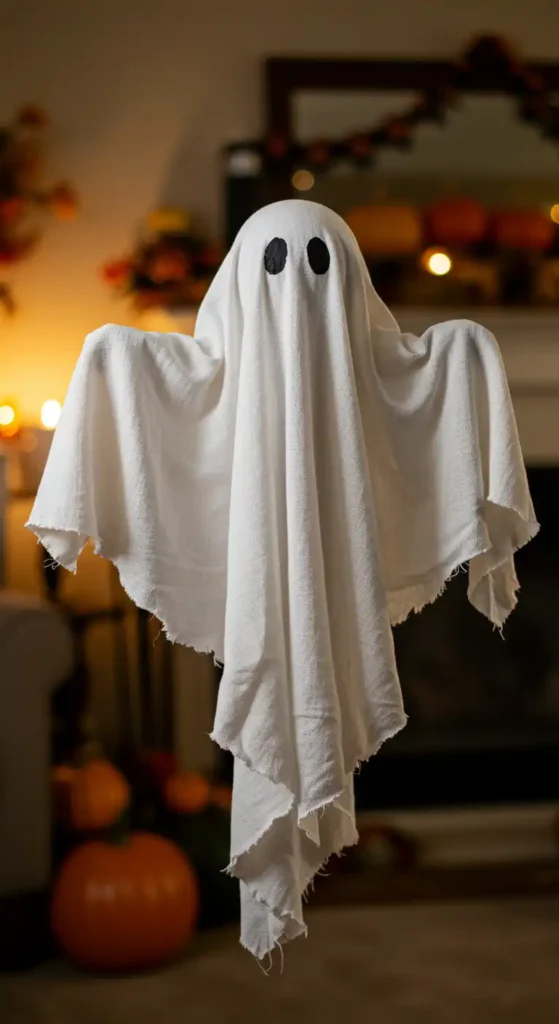
Traditional Cheesecloth Ghosts
Cheesecloth ghosts are a classic for a reason—they’re simple, eerie, and look fantastic indoors or out.
Step 1: Drape cheesecloth over a balloon or foam ball to form the head.
Step 2: Arrange fabric to create flowing arms and body.
Step 3: Spray with starch or a diluted glue solution to help the ghost hold its shape.
Step 4: Once dry, draw or attach felt eyes and mouth.
Step 5: Hang with invisible fishing line for a floating effect.
Expert Tip:
Layer cheesecloth for a more dramatic, “floating” look. Use LED tea lights inside for a spooky nighttime effect.
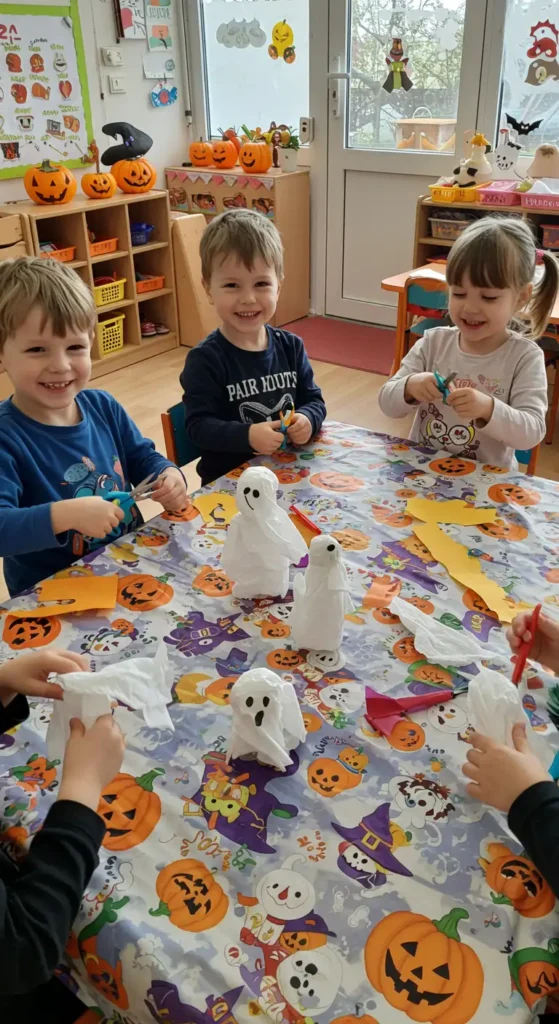
Simple Tissue or Fabric Ghosts (Perfect for Kids & Classrooms)
These easy diy ghosts are quick, easy, and safe for all ages.
Step 1: Crumple a small ball of tissue or newspaper.
Step 2: Cover with another tissue or a white napkin and tie under the “head” with a string.
Step 3: Draw on a face and hang wherever you like!
If you’re searching for an easy diy ghost decoration or a super simple, easy Halloween ghost project, this is the one to try with kids.
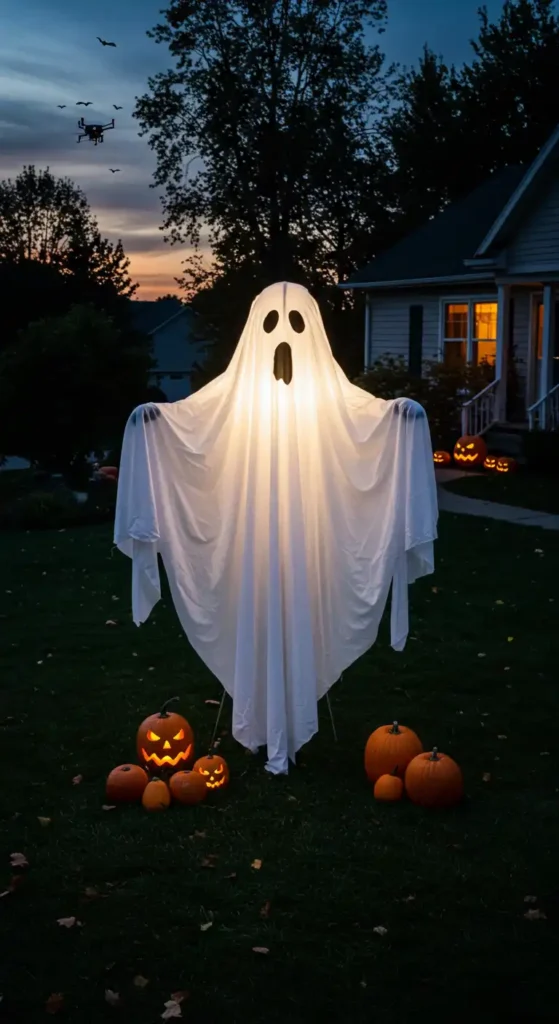
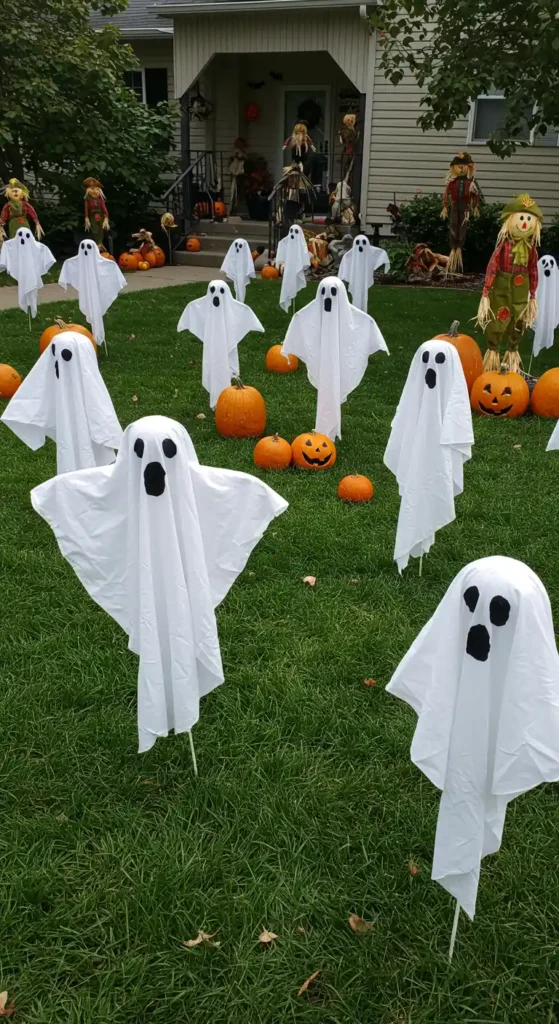
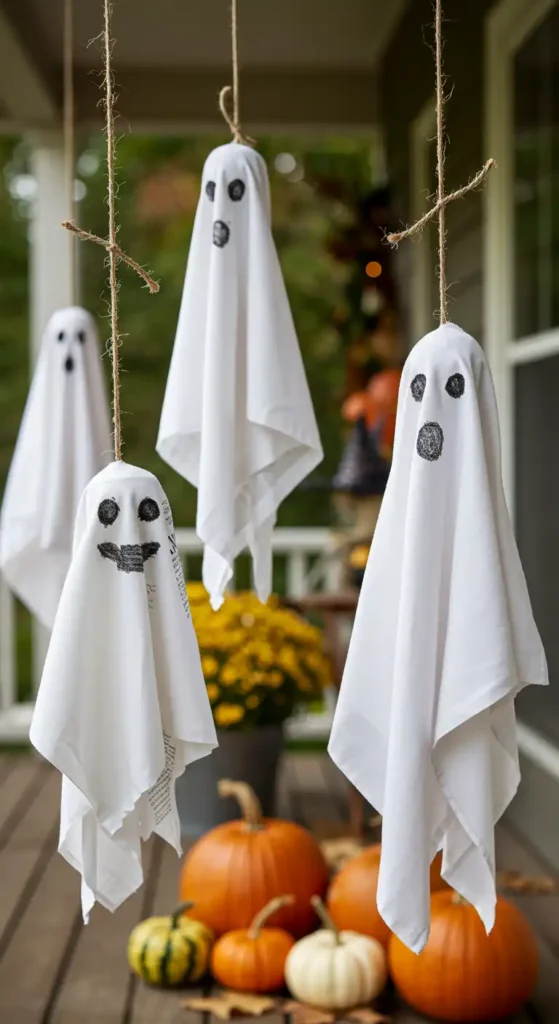
Large Life-Size & Standing Ghosts for Yard or Porch
If you want a centerpiece for your outdoor display, consider making a DIY standing ghost or a larger life-size ghost. These are perfect DIY Halloween ghosts for your yard and porch.
Step 1: Build a frame using PVC pipe or wire for the body and arms.
Step 2: Attach a foam ball or balloon for the head.
Step 3: Drape with white fabric, old sheets, or cheesecloth.
Step 4: Anchor to the ground or porch using stakes or heavy objects.
Step 5: Add waterproof lights inside for nighttime.
Safety Note:
Always secure large DIY yard ghosts carefully to prevent them from blowing away in strong winds.
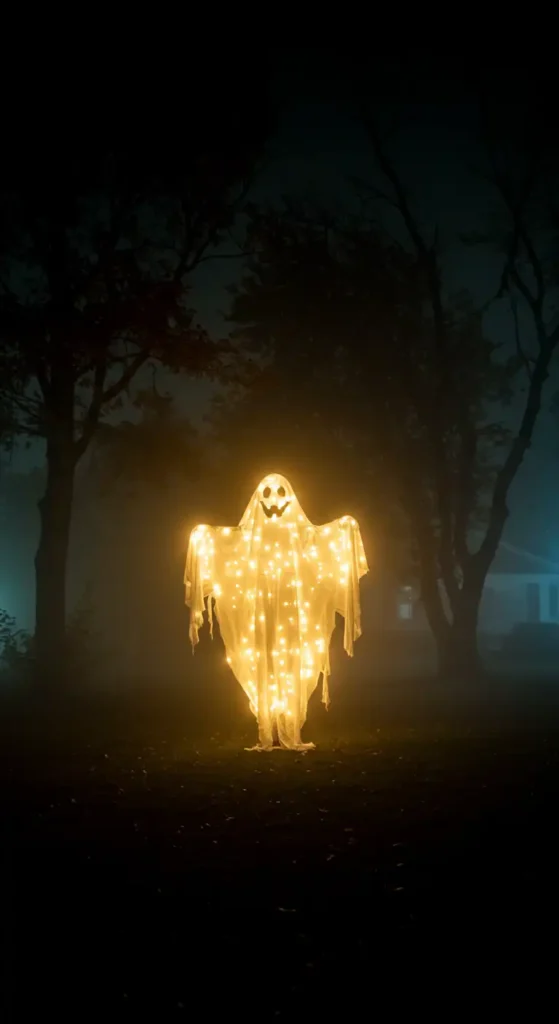
How to Make Light-Up and Floating Ghost Decorations
DIY Lighted Ghosts (Indoor/Outdoor)
Add glow for nighttime fright! These DIY outdoor Halloween ghosts and diy halloween ghost outdoor decorations are sure to make your home stand out.
- Wrap string lights or LED fairy lights around your ghost’s frame.
- Use battery-powered lights for safety—never use open flames.
- For diy outdoor ghost projects, choose lights rated for exterior use.
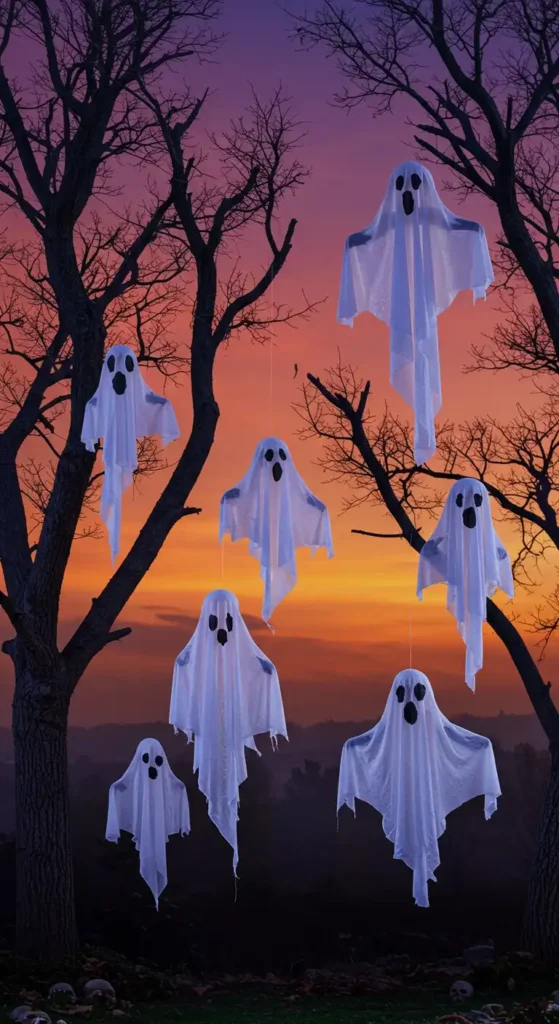
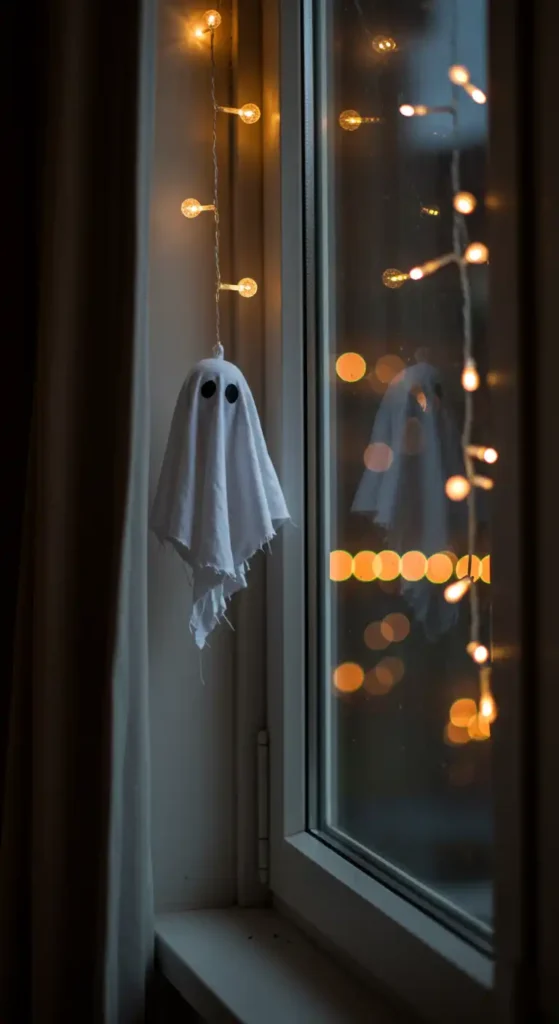
Floating/Hanging Ghosts
Want that classic “haunted” effect? Here’s how to make diy porch ghosts or hanging ghosts that seem to float mid-air:
- Suspend ghosts from trees, ceilings, or porch eaves with fishing line.
- Use lightweight materials, such as cheesecloth or tissue, for the best floating effects.
- Try grouping multiple hanging ghosts for a “haunted forest” look.
Unique Ghost Decoration Ideas for Every Space
DIY Lawn Ghosts & Yard Displays
For an unforgettable front yard display, try these DIY lawn ghosts, DIY yard ghosts, and DIY ghost decorations for the yard. If you want something extra special, consider DIY Halloween ghosts for your yard and DIY outdoor ghost decorations, which can be customized with lights and weatherproof materials.
- Use garden stakes, rocks, or bricks to secure outdoor ghosts.
- Spray with waterproofing spray, or use plastic bags under fabric for rain protection.
- Bring in during storms to prolong life.
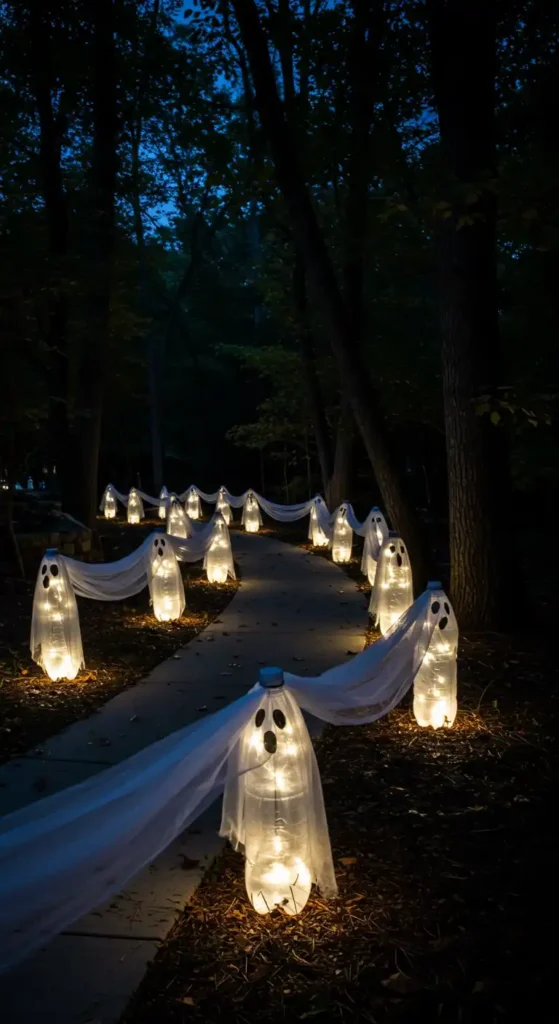
DIY Outdoor Ghost Projects
A DIY outdoor ghost project is both fun and budget-friendly. These are ideal for lining pathways or creating a spooky entrance. For larger spaces, DIY Halloween ghost outdoor decorations and DIY ghost decorations for the yard consistently receive a lot of attention.
Small-Space & Apartment-Friendly Ghosts
If you’re in an apartment or have limited space, focus on smaller homemade ghost crafts or window cling ghosts. Use removable hooks or tape to avoid wall damage.
Upcycled & Eco-Friendly Ghost Projects
Turn old T-shirts, pillowcases, or leftover fabric into ghosts. Use cardboard or newspaper for stuffing and finish with natural twine for hanging.
Expert Tips for Ghost Decorating Success
Common Mistakes (and How to Avoid Them):
- Ghosts won’t float: Use lighter materials and fine fishing line.
- Fabric collapses: Spray with starch or diluted glue and let it dry completely.
- Outdoor ghosts fade or fall apart: Use weatherproofing spray and secure tightly.
Weatherproofing & Durability:
- Bring ghosts indoors during intense storms or heavy rain.
- Repair tears with fabric tape or clear glue.
Decorating with Safety in Mind:
- Use battery-powered lights, never candles or open flames.
- Avoid trip hazards by keeping hanging lines and large displays out of the way.
- Keep small parts out of the reach of young children and pets.
Conclusion
DIY ghost decorations are a fun, creative way to celebrate Halloween—no matter your budget, space, or crafting experience.
From classic cheesecloth phantoms and diy sheet ghost decoration to diy standing ghost projects and glowing diy outdoor ghost decorations, there’s a project for everyone. Use eco-friendly materials, try something interactive, and—most importantly—have fun haunting your home!
FAQ’s
Q1: How do you make easy DIY ghost decorations for Halloween?
A: Use white fabric, cheesecloth, or old sheets to cover a balloon or foam ball for the head. Secure with string, add eyes and mouth, and hang with fishing line.
Q2: What are the best materials for homemade ghost decorations?
A: Popular choices include cheesecloth, cotton sheets, gauze, and even recycled T-shirts. For outdoor ghosts, use weather-resistant materials and waterproof spray.
Q3: How do you make DIY lawn ghosts that stand up?
A: Build a frame using PVC pipe or wire, attach a head, and drape with fabric. Anchor the base with stakes or rocks so your lawn ghosts stay upright.
Q4: How can I make my ghost decorations glow at night?
A: Place LED lights or glow sticks inside your ghost decorations for a spooky glowing effect. Always use battery-powered lights for safety.
Q5: How do you weatherproof outdoor ghost decorations?
A: Use waterproof fabric or spray, secure all parts tightly, and bring ghosts indoors during heavy storms to prolong their life.
Q6: Can I make kid-friendly ghost decorations?
A: Absolutely! Use soft, safe materials, avoid small parts, and let kids decorate faces with markers or stickers.